The checklist generator page is where a single checklist is created from a collection of lists. After selecting a root list as the starting point, the user begins answering questions, selecting options, and providing values as prompted. The answers provided reflect the current conditions, circumstances, and environment that applies to the user in the time & place that they will perform the steps of a routine.
This page is designed to be used on a mobile device but also works well in a laptop/desktop browser.
¶ Workflow
¶ Select Where to Start: the Root List
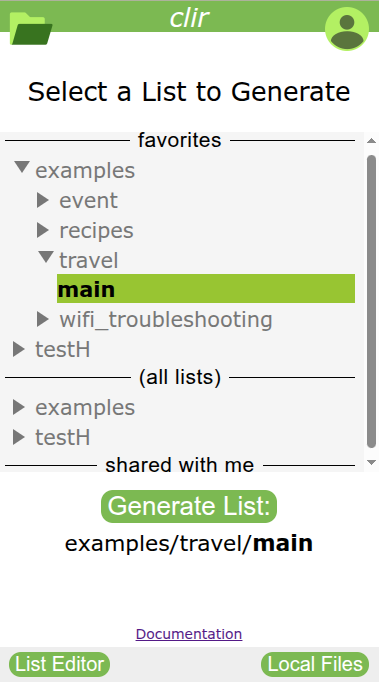
This first page is where the root list is selected. The “favorites” section at the top of the list shows only lists which are known to be root lists (having been marked as such or having been the start of a generation process). To see a complete view of the full contents, select from the “all lists” section. The last “shared with me” section shows all lists that are shared by other users.
The behavior of this view is identical to that of the list browser pane in the editor window, in terms of how folders can be expanded or collapsed in order to find the desired list.
Click Generate List to start the process.
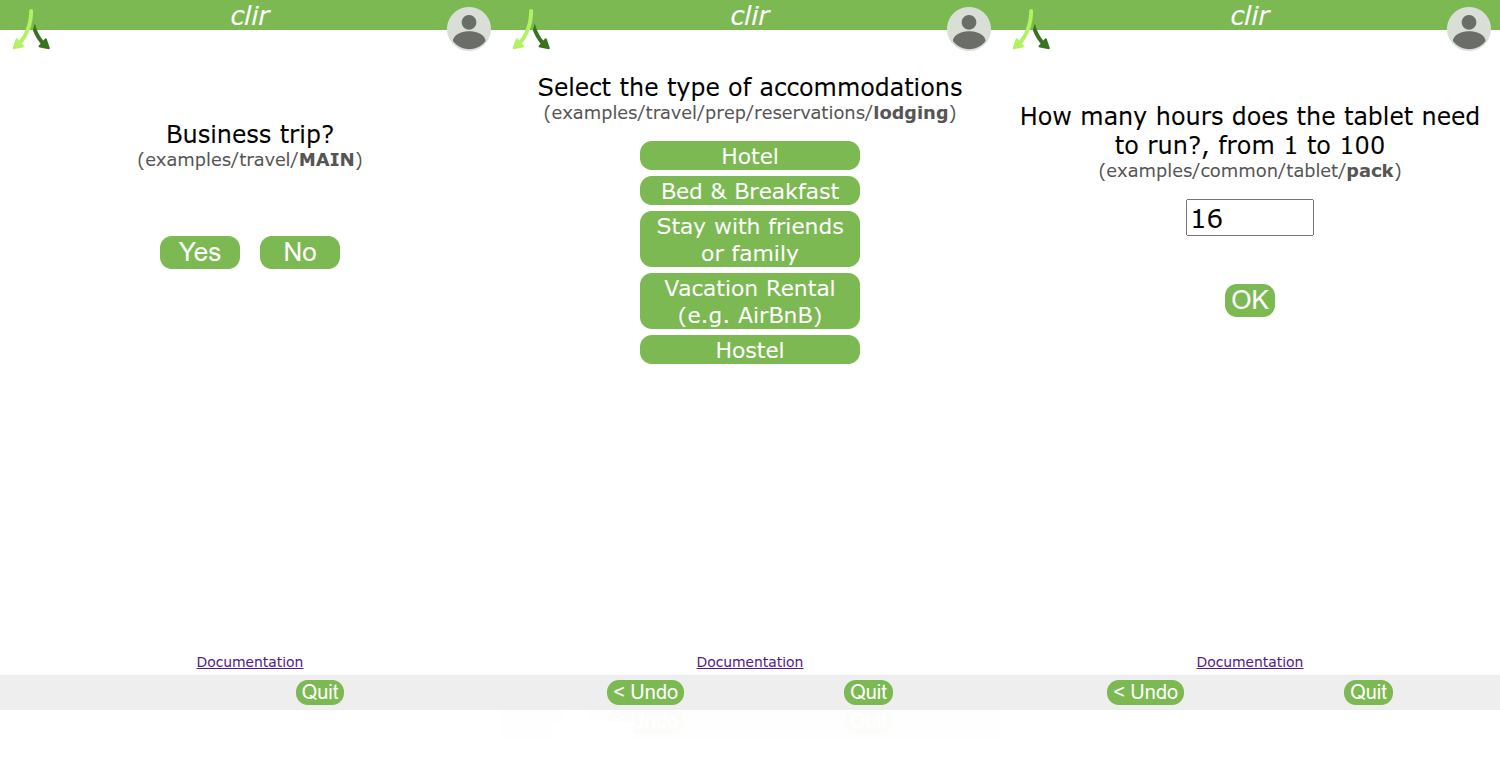
¶ Answer All Prompts
As the generator progresses through the lists, prompts are presented to the user. Not all prompts may not be seen, depending on the answers given. At each prompt, there is an option to undo the previous response. Below are some examples of different prompt types.
¶ Restoring a Saved Checklist Session
Not all checklists can be completed in a single session, and it may be necessary to switch between checklists. The Saved Checklist feature can help in situations like this. This is accessible by clicking the Local Files button at the bottom-right of the list generator page. The resulting pop-up window is shown below.

Here, a history of all incomplete and completed lists is available. These are sorted by the time since their last change in the checklist view. By default, lists are named by their folder path. Name collisions aren't a problem because each list name has a hidden timestamp suffix, and lists can be renamed for better organization.
Lists which are marked as Incomplete (having one or more uncompleted tasks) can be selected and then loaded into the checklist page. A completed list must be reset first, after which the Load button can be clicked to transition to the checklist page.
No “Save” option exists anywhere in the interface because checklist progress is automatically saved with every completed task. Completed lists will be saved for only 3 days, but incomplete lists are saved for 2 months (or 4 months if renamed). A generated checklist can also be manually deleted. Note that all saved lists reside in the browser local storage of the mobile device--not on the server. It is possible for these saved lists to be deleted if cookies and/or “other site data” are cleared in the browser settings.
¶ Final Checklist: the Working View
After all prompts have been answered, click the Generate Checklist button to show the checklist page: the mobile-optimized interface where the checklist is used to complete a routine.
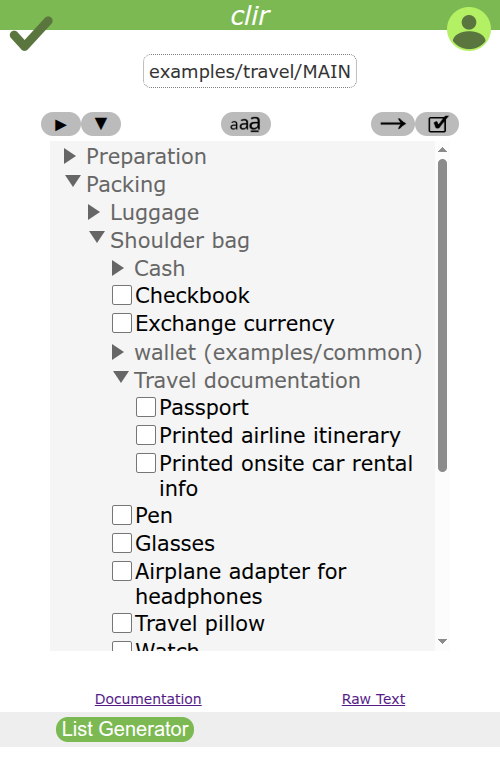
Clicking the checkbox of a task item will cross it off and hide it from view. Clicking a header will expand or collapse the view of tasks that are contained below it.
A series of buttons above the checklist frame can be used to customize the view. From left to right: the arrow buttons will expand or collapse all headers in the checklist. The middle button toggles between 3 levels of font size. The arrow button switches between line wrap mode for longer lines. The checkbox button will show or hide the completed items.
When completed, the button at the bottom of the page will go back to the first page of the checklist generator, where the process can be started again from another checklist, or a saved checklist can be resumed.
¶ Future Improvements
In the future, native mobile apps for Android and iOS will be developed for this interface, giving a better user experience for on-the-go usage.