Extensibility is an important part of clir. It is fundamentally designed to generate content for checklists and/or documentation. The way that this content is used is another matter. Of course, clir has a very useful and functional interface for going through a procedure using the checklist. But once generated, the checklist can be imported into other software platforms if desired.
The simplest way to export is to select the “Raw Text” link in the Checklist view, and then copy + paste the contents in some other platform.
The one working extension is discussed below, but more advanced extensions are in development.
¶ Todoist.com
Todoist is a popular task management app with solid features and a great interface. This extension allows you to export a generated checklist to your todoist account, where the items can be viewed and checked.
¶ Setup
Nothing needs to be installed on your todoist app, but you will need the todoist API token for your account. This page explains how to obtain this token within the todoist website or app.
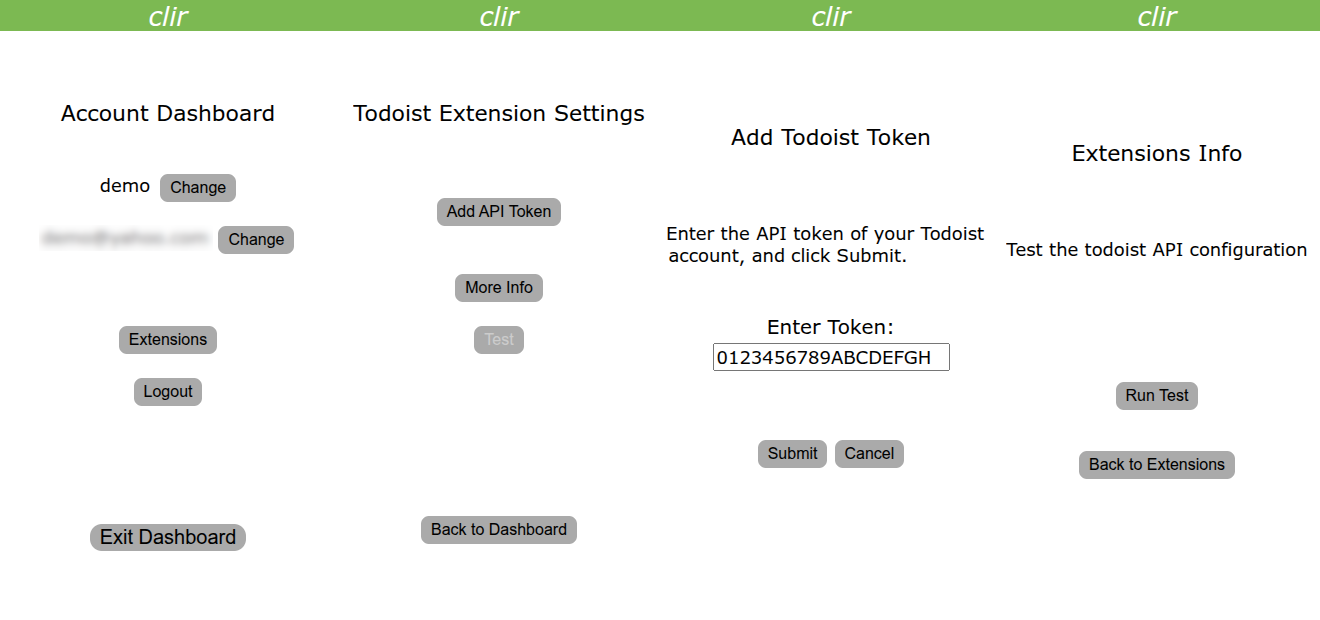
Once you have the token, you can enter it in your clir account by navigating to the account dashboard, clicking “Extensions”, then clicking “Add API Token”. After clicking “Submit”, go back to Todoist Extension Settings and click “Test”, then “Run Test”. The message will indicate whether or not clir successfully connected to your account.
¶ Using the Extension to Export a Checklist to Todoist
The export process happens after the checklist has already been generated. To export, go back to the main generator page and click “Local Files” at the bottom.
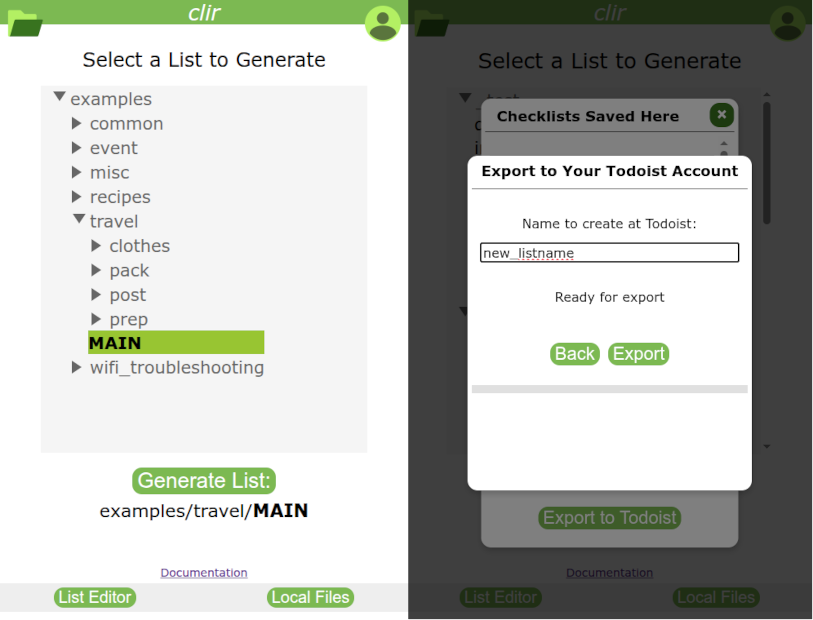
In the pop-up dialog window, select the list that was just generated (it will be at the top of the list), and click “Export to Todoist”. A new pop-up dialog appears. The checklist's generated name is shown, and can be changed to anything you want. This is how the list will be named in Todoist. Click “Export”, and a status bar displays the progress. The amount of time it takes depends on the size of the list and on the Todoist server.
You don't need to wait in this view until the process is complete; it's possible to click “Back” and do other things in the clir app in the meantime. However, it is best not open the exported list in the Todoist app too soon, because partial content may appear before the full list is available.
¶ Importing Tasks from a Todoist Project
It is also possible to import tasks from a Todoist project/list using text variable substitution. This section shows how.
¶ Uninstalling the Todoist Extension
Since nothing was installed in the Todoist app, the only step needed is to remove the API token in clir. Do this by following the setup steps above to get to the token screen, deleting the key, and clicking “Submit”.